
Table of Contents
Finding yourself looking at your dog’s paw, noticing a red, swollen, or just “off-looking” nail, is a scenario I have encountered with hundreds of pet owners in my exam room. The immediate worry sets in: Is this serious? Do I need to rush to the emergency vet? Can I fix this myself?
First, take a deep breath. You are in the right place. As a veterinarian, I believe that an educated owner is a dog’s best advocate. While many nail issues eventually require professional medical intervention, the care you provide at home plays a massive role in your dog’s comfort and recovery.
In this guide, I am going to walk you through exactly how to approach home treatment for a suspected dog nail infection. We aren’t going to get bogged down in complex medical terminology or try to diagnose the specific microscopic cause of the infection. Instead, we are going to focus on safe, effective, and supportive care that prioritizes hygiene, protection, and pain management.
What Does “Home Treatment” Mean for a Dog Nail Infection?
Before we dive into the steps, it is vital to clarify what I mean when I say “home treatment.” In the veterinary world, we often call this “supportive care.”
Home treatment for a nail infection isn’t about performing surgery in your kitchen or guessing which leftover antibiotics from three years ago might work (please, never do that). Instead, home treatment is about creating the optimal environment for the body to heal itself.
Think of it like treating a minor scrape on your own finger. You clean it, you protect it, and you keep an eye on it. That is exactly what we are doing for your dog. The goal of home treatment is to:
- Reduce bacterial load: Keeping the area clean prevents new bacteria from entering the compromised nail bed.
- Minimize trauma: Stopping the dog from licking, chewing, or banging the nail.
- Monitor progress: Acting as the eyes and ears to know if the body is winning the fight or if it needs professional reinforcements.
It is a partnership between good hygiene and careful observation.
When Home Treatment May Be Appropriate
Not every nail issue warrants a panic button. In my years of practice, I have seen many minor irritations resolve with diligent owner care. You might be safe to try home treatment for 24 to 48 hours if your dog fits the following description:
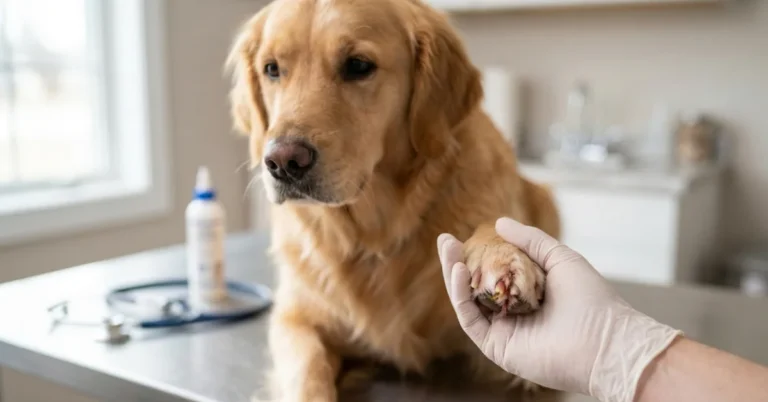
- The Symptoms are Mild: You notice slight redness around the base of the nail or the cuticle, but the toe isn’t swollen like a balloon.
- The Nail is Intact: The nail might look a bit discolored or brittle, but it is physically attached. It isn’t dangling, split down the middle, or cracked into the “quick” (the sensitive blood vessel inside).
- Behavior is Normal: Your dog is still eating, drinking, and eager to go for walks. They might lick the paw occasionally, but they aren’t obsessively attacking it.
- Pain is Manageable: Your dog lets you touch the paw (gently) without yelping, growling, or snapping. If they pull away slightly, that’s normal tenderness. If they scream, that’s severe pain.
If this sounds like your situation, starting a home care regimen is a reasonable first step.
When Home Treatment Is NOT Enough
I cannot stress this enough: there is a fine line between a minor issue and a medical emergency. Nails are directly connected to the bone (the distal phalanx). An untreated infection can travel from the nail bed into the bone, causing osteomyelitis, which is a serious, bone-destroying condition.
Please stop reading and call your vet if you see:
- Worsening Pain: If your dog cannot put weight on the leg or cries out when you barely graze the paw.
- Severe Swelling: If the toe looks twice its normal size or the redness is spreading up the leg.
- Discharge: Pus, blood, or a sticky, foul-smelling liquid oozing from the nail bed is a sign of deep infection that surface cleaning cannot fix.
- The “Rotten” Smell: If the paw has a distinct, cheese-like, or rotting odor, simple cleaning will not suffice.
- Systemic Illness: If your dog is lethargic, vomiting, or skipping meals. This suggests the infection might be affecting their whole body.
- A Loose Nail: If the nail is hanging by a thread, do not try to pull it off at home. This is incredibly painful and requires sedation and sterile tools.
Dog Nail Infection Home Treatment – Step-by-Step Care
If you have determined that your dog is in the “safe zone” for home care, here is the protocol I recommend to my clients. Consistency is key here. Doing this once won’t help; it needs to be a routine.
Keeping the Infected Nail Clean
Infection thrives in dirty, debris-filled environments. Your primary job is to keep the area pristine without using harsh chemicals that damage healthy tissue.
The Soak: I recommend soaking the affected paw twice a day. You don’t need expensive medical solutions.
- Use warm (not hot) water in a shallow bowl or tub.
- You can add plain Epsom salts (unscented) if you have them—about one teaspoon per cup of water—but plain warm water works well to loosen debris.
- Let the paw soak for 3 to 5 minutes. This softens any crusty discharge and opens up the pores slightly.
The Wash: After the soak, gently clean around the base of the nail. You can use a very mild, fragrance-free dog shampoo or a dilute chlorhexidine solution (often available at pet stores). Use a soft washcloth or a gauze square. Do not scrub; just wipe away debris gently.
The Most Important Step: Drying: This is where most people fail. Bacteria and yeast love moisture. If you wash the paw and leave it damp, you are actually helping the infection grow. You must thoroughly dry the paw. Pat it dry with a clean towel, and if your dog tolerates it, use a hair dryer on the coolest setting to ensure the nooks and crannies around the nail bed are bone dry.
Protecting the Nail at Home
Once the nail is clean and dry, you need to protect it from the environment. Carpet fibers, dirt, and dust are enemies of a healing nail.
- Clean Bedding: Wash your dog’s bedding immediately. If they sleep on a crate mat or a favorite blanket, get it into the laundry. You want them resting on a clean surface.
- The “Potty Boot”: When your dog goes outside to do their business, the paw needs protection. You can use a dog bootie or, in a pinch, an IV bag or a sturdy plastic bag secured (loosely!) with vet wrap tape.
- Remove Immediately: As soon as the dog comes inside, take the boot off. Airflow is vital for healing. Never leave a boot or bandage on a potentially infected foot 24/7. This creates a “greenhouse effect” that traps heat and moisture, causing bacteria to multiply rapidly.
This article may contain affiliate links. We may earn a small commission at no extra cost to you.
Preventing Licking and Chewing
This is the hardest part for owners, but it is the most critical. You must stop the licking.
I hear this every day: “But he’s licking it to clean it! It’s natural!”
I promise you, it is not helping. A dog’s mouth is full of bacteria. Licking a nail infection adds moisture and new bacteria to the wound. Furthermore, the physical act of rasping the tongue over the nail bed causes micro-trauma, preventing the tissue from closing up.
- The E-Collar: Yes, the “Cone of Shame.” It is the only 100% effective way to stop access. There are softer, inflatable versions available now that are more comfortable than the hard plastic lampshades.
- Distraction: If you are supervising your dog directly, you can keep the cone off. Use puzzle toys or treats to keep their mind off their foot. But the second you leave the room or go to sleep, the collar must go back on.
What to Avoid During Home Treatment
In my decade of practice, I have seen home remedies go wrong more often than I care to count. Please avoid these common pitfalls:
- Hydrogen Peroxide: Do not pour this on the nail. While it bubbles and looks like it’s working, peroxide actually damages healthy skin cells and slows down healing. It is too harsh for repeated use.
- Tea Tree Oil: This is often touted as a natural antiseptic, but it can be toxic to dogs if ingested (and they will lick it off). Avoid it completely.
- Human Ointments: Avoid slathering thick, petroleum-based antibiotic ointments on the nail unless specifically directed. These heavy ointments trap moisture and dirt against the infection, often making it worse.
- “Home Surgery”: If a nail looks loose, do not try to clip it or pull it off with pliers or nail trimmers. The pain you will cause your dog is immense, and you risk leaving a piece of nail behind, which acts as a foreign body and perpetuates the infection.
How Long Does Home Treatment Take to Show Improvement?
Patience is required, but not infinite patience. Nail beds are tricky areas because blood supply can be limited compared to other parts of the body, and the nail itself is hard, making it difficult for the body to clear things out.
If you are strictly following the cleaning and protection protocol, you should see:
- In 24 hours: The nail should look no worse.
- In 48-72 hours: The redness should start to fade, the swelling should go down, and your dog should seem more comfortable.
If you hit the 3-day mark and the toe looks exactly the same—or if at any point during those 3 days it looks worse—home treatment has failed. This isn’t a failure on your part; it simply means the infection is deep enough that the body cannot clear it without prescription medication.
Supporting Your Dog’s Recovery at Home
Healing takes energy. While you are treating the paw locally, you need to support the whole dog.
- Strict Rest: Now is not the time for 5-mile hikes or fetch in the park. The movement of the nail against the ground causes friction and pain. Keep walks to “business only” (potty breaks) and keep your dog quiet indoors.
- Nutrition: Ensure your dog is eating their regular, balanced diet. I’ve seen owners try to switch foods suddenly during an illness, which often leads to an upset stomach on top of the nail issue. Stick to what they know.
- Daily “Paw Checks”: Set a reminder on your phone. Inspect the paw in good lighting every single morning and evening. Take a photo with your phone so you can objectively compare if it looks better or worse than yesterday.
Common Home Treatment Mistakes Dog Owners Make
We all want the best for our dogs, but sometimes our good intentions backfire. Here are the top mistakes to watch out for:
- Inconsistency: Soaking the foot once and then forgetting about it for two days won’t work. You need a rhythm.
- Giving In to the “Sad Eyes”: Taking the protective cone off because the dog looks sad usually results in five minutes of intense licking that undoes three days of healing.
- Covering it 24/7: I mentioned this earlier, but it bears repeating. Leaving a sock or bandage on the foot all day creates a warm, wet environment. The foot needs to breathe.
- Assuming Improvement means Cured: Just because the dog stops limping doesn’t mean the infection is gone. Continue your hygiene routine for a few days even after the paw looks better to ensure you don’t have a relapse.
Frequently Asked Questions
Can dog nail infections heal at home?
Yes, very mild surface infections can resolve with strict hygiene and rest. However, deep infections, nail bed issues, or infections caused by foreign bodies (like a splinter) almost always require veterinary medication to fully clear.
Is home treatment safe for all dogs?
No. If your dog is a young puppy, a senior, or has a compromised immune system (like a dog with Cushing’s disease or diabetes), you should skip home treatment and see a vet immediately. Their bodies are less capable of fighting off even minor infections.
Should I walk my dog during home treatment?
You should limit walks strictly to bathroom needs. Walking on hard pavement vibrates the nail and causes pain, while walking on grass or dirt exposes the infection to more bacteria. Keep them short and on a leash.
When should I stop home treatment and see a vet?
If you see no improvement after 3 days, if the dog stops eating, if the pain increases, or if you see blood or pus. These are non-negotiable signs that you need professional help.
Final Veterinary Advice for Dog Owners
Nail issues are frustrating. They are painful for the dog and stressful for you because they seem to take a long time to look “normal” again. The best advice I can give you is to trust your intuition. You know your dog better than anyone.
If you are cleaning the paw and protecting it, but you still have a nagging feeling that your dog is in pain, listen to that feeling. There is no shame in trying home care, but there is also no shame in admitting it isn’t working and seeking help.
Be diligent with the cleaning, be strict with the cone, and keep a close watch. Safe home care is about bridge-building: helping your dog cross from “ouch” to “okay,” while always being ready to call in the professionals if the bridge starts to wobble.
Disclaimer: This article is for educational purposes only and does not constitute veterinary medical advice, diagnosis, or treatment. Always seek the advice of your veterinarian with any questions you may have regarding a medical condition.


One Comment